

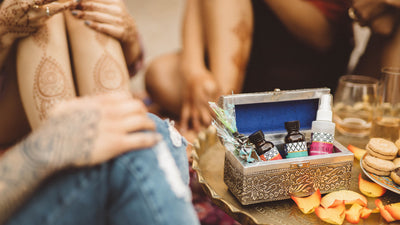
Creating Your Design Books

- Make several identical books! One for the artist and some for the guests to look at
- 3 Ring Binders and page/sheet protector sleeves from the office supply are your best friends
- Organize clearly for quick shopping - make it easy for your clients!
- We divide by price, $5, $10, $15, $20, $25. $30, $40. Increments of 5 are easy for making change at festivals. Each section has a variety of styles. Hopefully there is something for everyone at each price point.
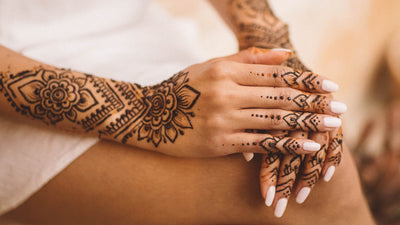
- Try to create life sized designs. You'll be asked frequently how large a design is, it's easy to say 'what you see is what you get'.
Organization is Key! |
|
|
|
|
 |
Ebooks are designed for you to use, pictures and designs printed from the internet are not okay or legal for you to use in your design books/boards. |
|
Organize your book!
|
|
 |
Divide by price
|

|
Create gorgeous henna! Even with a design book, feel free to make adjustments to the design as you work. This creates a more personal experience for your client and helps you exercise your creative side. I will usually ask the client if they'd like it just like the drawing or can I make it unique for them. It's fun adding little flourishes or extra dots here and there - it makes people feel special. |
 |
Show designs placed on the body and on their own
|
 |
Make copies. A bunch
|

|
Your gorgeous books are ready to go!
|


There are many ways to create your design selections. This is what I've tested and found works best for my business, system and client type. Some people prefer posters, banners, or small drawings with real henna.
I like dividing the book by price points
- Allows clients to shop within their budget.
- Clients don't have to discuss their budget with me so there's no embarrassing conversation about how much they can spend
- Children can be directed to choose from certain sections which limits parental frustration
- I use tokens to help streamline the payment and design choice process. My tokens are color coded and match the sections of the notebooks. Example: $5 tokens are red, the $5 section of the book has a red tab.
I love organizing the book by sections that are similar in complexity and time
- Helps the artist manage time. The designs in each section take about the same amount of time.
- Speeds up the selection process
- For parties with lots of guests and limited time or budget, I remove the larger design sections and keep the smaller ones. That helps me to work quickly and the guests have no idea the fancy designs are missing.
User Name 2 Days ago
Lorem ipsum dolor sit amet, consectetuer adipiscing elit. Aenean commodo ligula eget dolor.