


Elsa's Frozen Snowflake Tattoo Stencil. Size: small 2x2 inches
Professional vinyl stencils are the go-to for gorgeous glitter tattoos, mica tattoos, and can even be used with henna or jagua! Quick, efficient, and easy to use for all artists, no matter their drawing level! All designs are licensed and ready for use at fundraisers, beach parties, spirit events, and parties. Young children love the magic when you remove the vinyl stencil and reveal their ultra-sparkly glitter tattoo.
For glitter and mica tattoos, you'll need:
- Glitter Tattoo Stencils, professional 3 part vinyl stencils
- Acrylic Adhesive Applicator Wand (ProsAide)
- Cosmetic polyester glitter, bio-degradable cosmetic glitter or mica powders
Tips and Tricks for Glitter Tattoos
Do NOT allow glue to FREEZE. The adhesive will turn solid and be ruined if frozen.
Store below 100 degrees Farenheit.
Glitter Tattoos work best on hair-free locations
Apply glue in a thin smooth layer, thicker layers tend to roll up at the edges and wear off more quickly
Use Opaque polyester glitter colors for the most colorful and bright glitter tattoo. Use holographic translucent polyester glitters for an elegant, subtle glitter tattoo.
Some of the simpler stencils may be used several times if you remove them carefully.
Easily remove glitter tattoos with make-up remover, or rub with a washcloth after a soak in a warm bath.
Remove glue from skin, brushes and tools with Isopropyl Myristate Adhesive Remover or 99% rubbing alcohol
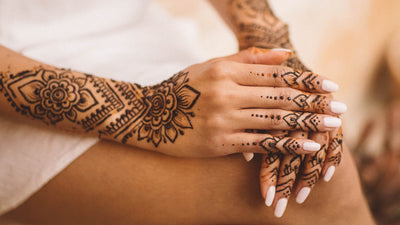
For Henna designs, simply fill the stencil with a thick coat of Henna Caravan natural henna. Gently remove the stencil and allow the henna to set for several hours.
How to use 3 part vinyl stencils for Glitter Tattoos
A) Apply Stencil
1. Start with CLEAN, dry skin! Wash skin with rubbing alcohol and choose a hair-free location for best results. Let the skin dry thoroughly.
2. Carefully remove the white backing layer of the stencil to reveal the adhesive, leaving the clear layer in place.
3. Apply sticky adhesive side of the stencil to clean skin. Rub firmly over the entire stencil. Make sure the stencil is fully and completely adhered to the skin.
4. Starting from a corner, carefully remove the clear transfer tape from the top layer of the stencil. Using your fingernail, pull one of the top edges and slowly roll it down and away from the vinyl stencil. If a piece of the stencil sticks to the transfer tape, just lay it back on the skin, press it down again and then continue removing the top layer.
B) Apply Glue
5. We LOVE using the applicator wands with liquid acrylic adhesive for glitter tattoos! Apply a thin, even coat of adhesive to the skin, moving from the edge of the stencil inward.
6. Allow the adhesive to dry briefly to prevent smears. You're ready to apply the glitter!
C) Apply glitter!
7. Apply a generous amount of glitter directly to the adhesive using a brush or an open lure lock cap. Gently rub the glitter onto the glue/skin to make sure it's fully adhering to the adhesive.
8. Remove the stencil by peeling up an edge and rolling the stencil back on itself. A toothpick can be used to help pull off any stubborn pieces. Brush off excess glitter.
Sparkly glitter tattoos will last up to a week!
Remove with, isopropyl myristate, make-up remover, or scrub off after a soak in the bath.


User Name 2 Days ago
Lorem ipsum dolor sit amet, consectetuer adipiscing elit. Aenean commodo ligula eget dolor.